+Roof Curb Parts
SSM offers a one-of-a-kind patented (US Patent #US 9546485B2) roof curb that comes in one piece with no assembly required making for easy install.
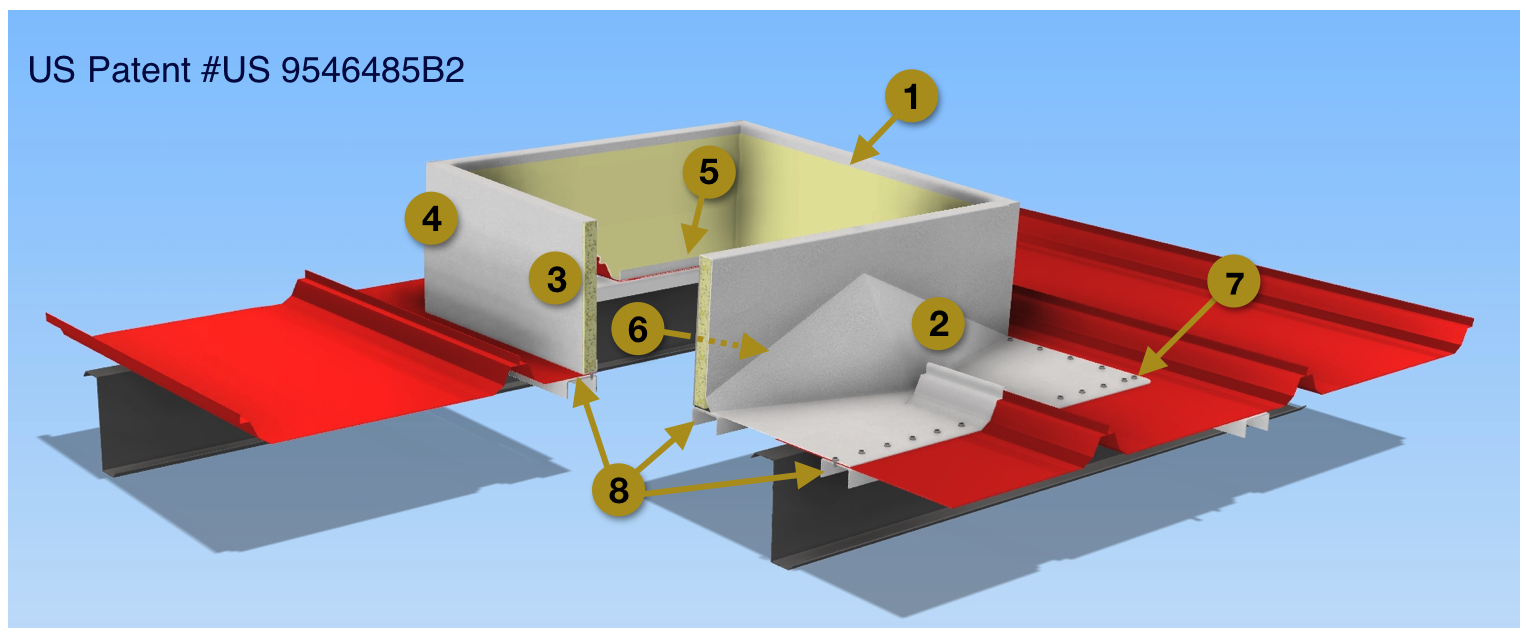
1. 24 gauge Galvalume®, welded cap is part of our patented design.
2. Integral water diverter cricket.
3. Our components are 18 ga. Galvalume® or as project requires. Our standard Top Flange is 1 1/2” wide but this can vary depending upon your job requirements.
4. Standard height is 10”and sloped to the roof pitch to provide a level mounting surface, based upon your project’s specific needs.
5. The bottom flange, found on 3 sides, is also 1 1/2” wide but custom widths are available.
6. The interior of the Cricket is full enclosed and insulated.
7. Pre-laid out fastener holes, 9/32” in diameter, are placed at 3” [max.] centers around the full curb perimeter.
8. 12 gauge panel support channels.
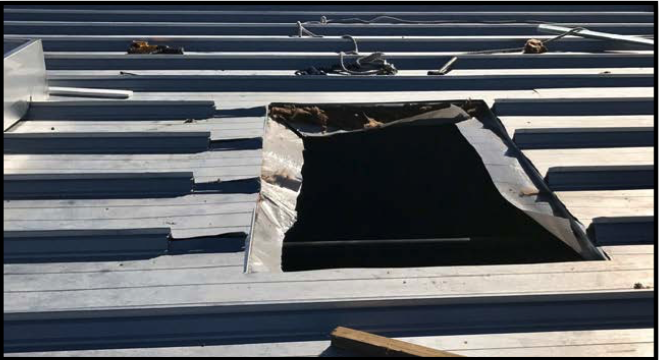
+Phase 1: Prep Your Spot
Engineered for ease of Installation, SSM‘s one piece hybrid curb solution is designed to make installation easy.
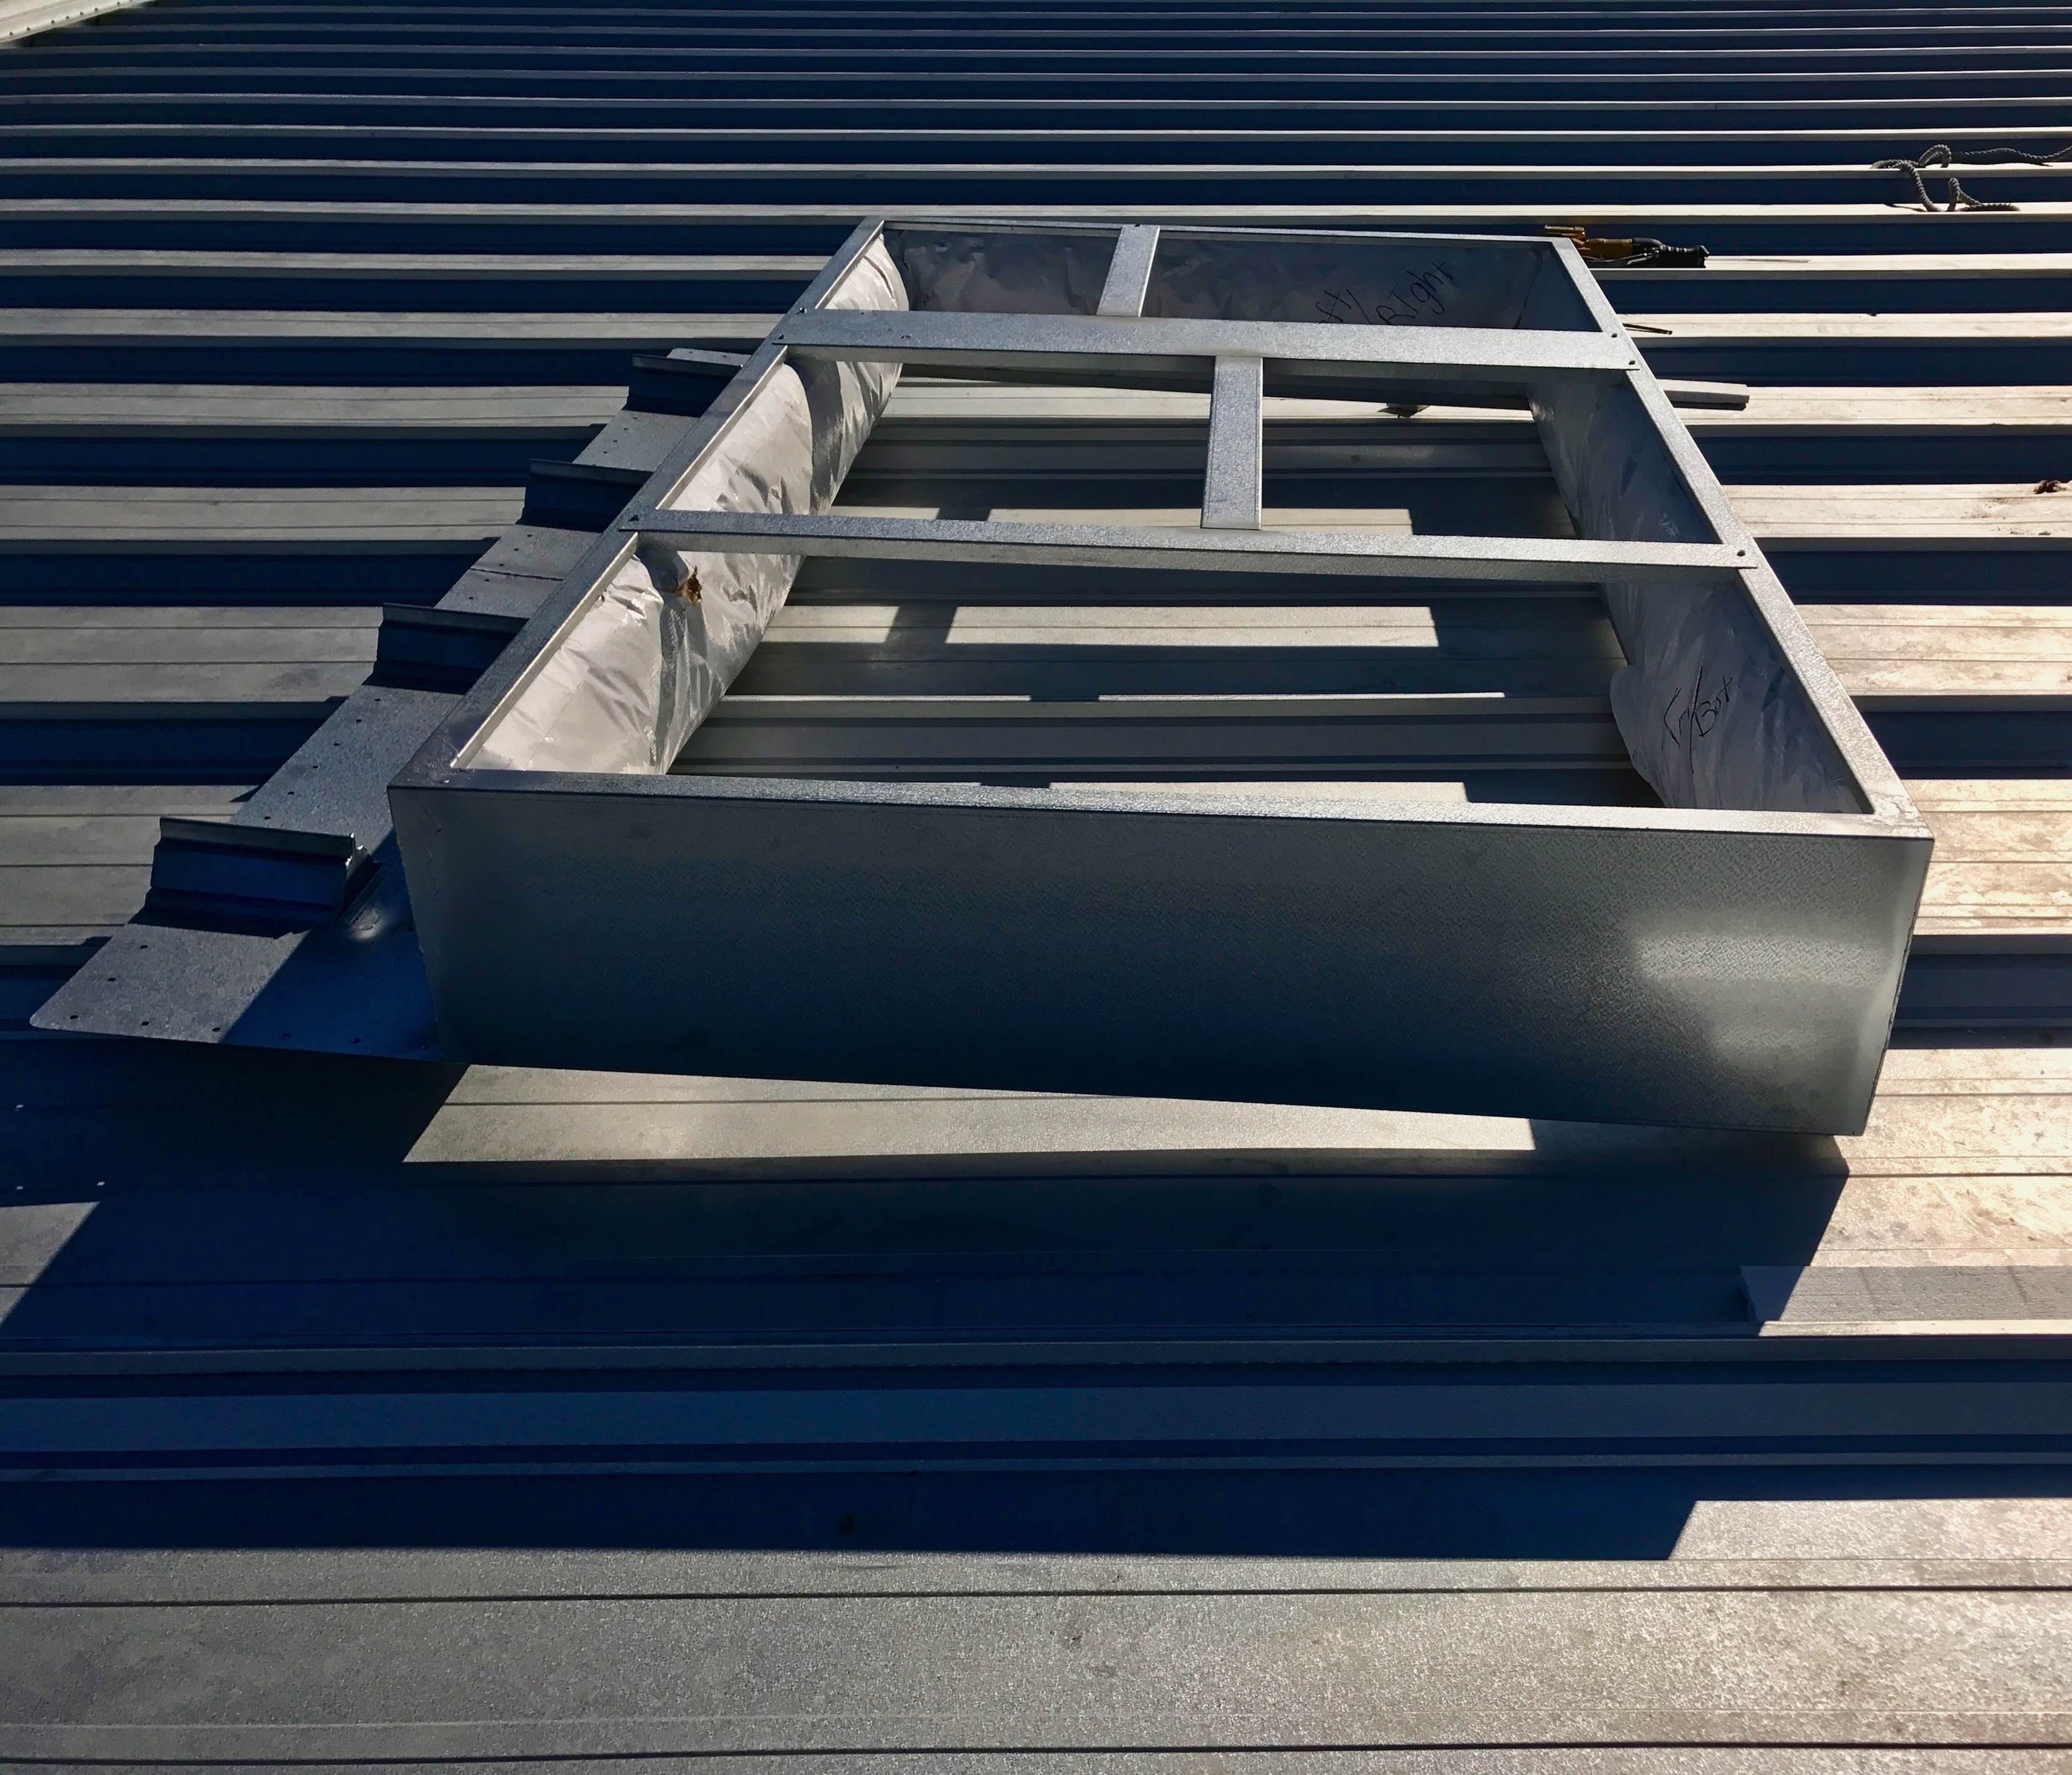 A] Set the curb in place and mark the area to be removed.
B] Cut the opening needed and trim back the roof’s standing seam components as needed for the curb to seat properly.
C] Clean the area around the opening to remove loose particles.
+Phase 2: Lay Your Roof Curb Down
 D] Apply double stick butyl tape [provided] to the underneath side of the perimeter of the roof curb.
E] Trim all excess butyl and check to see that the tape is secure.
F] Remove the backing layer from the tape and flip the hybrid roof curb over – holding it above the roof opening – and check for proper alignment.
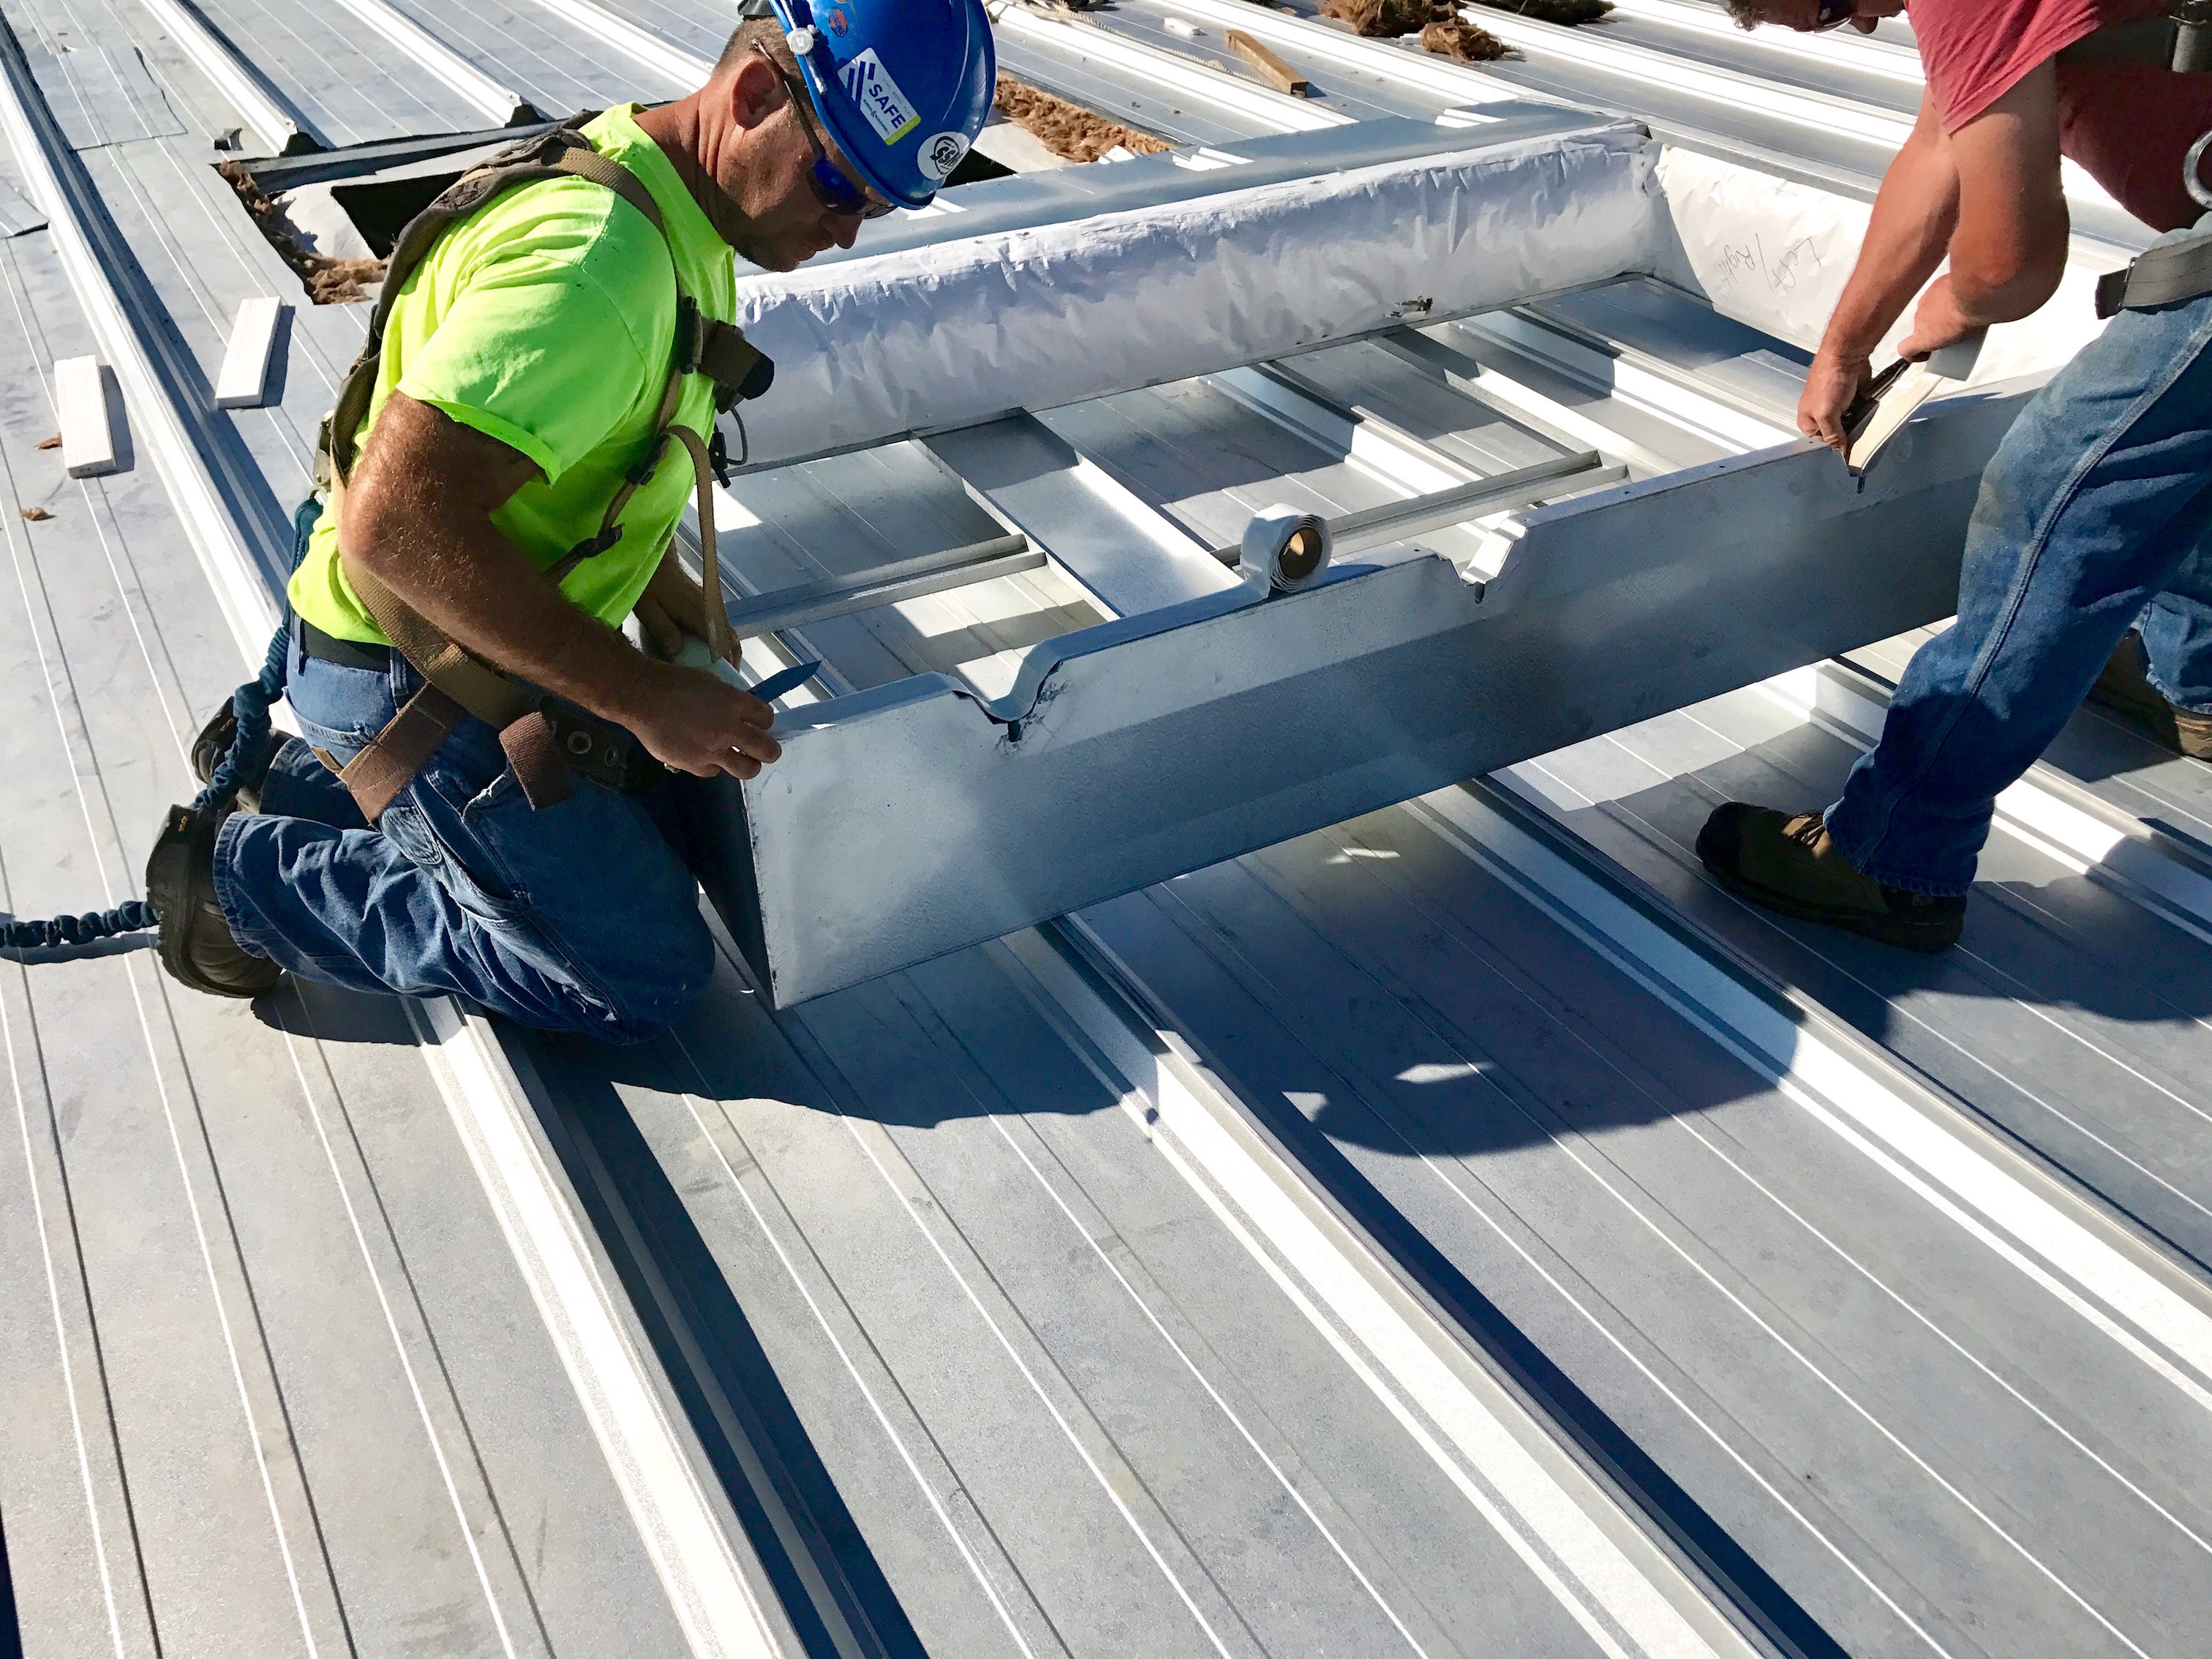
+Phase 3: Place Your Roof Curb
 G] Place curb in position and press down along the butyl tape edges to ensure even contact.
H] Secure the curb in place, as per the provided fastener holes, with mechanical fasteners [provided].
+Phase 4: Clean Up and Finish
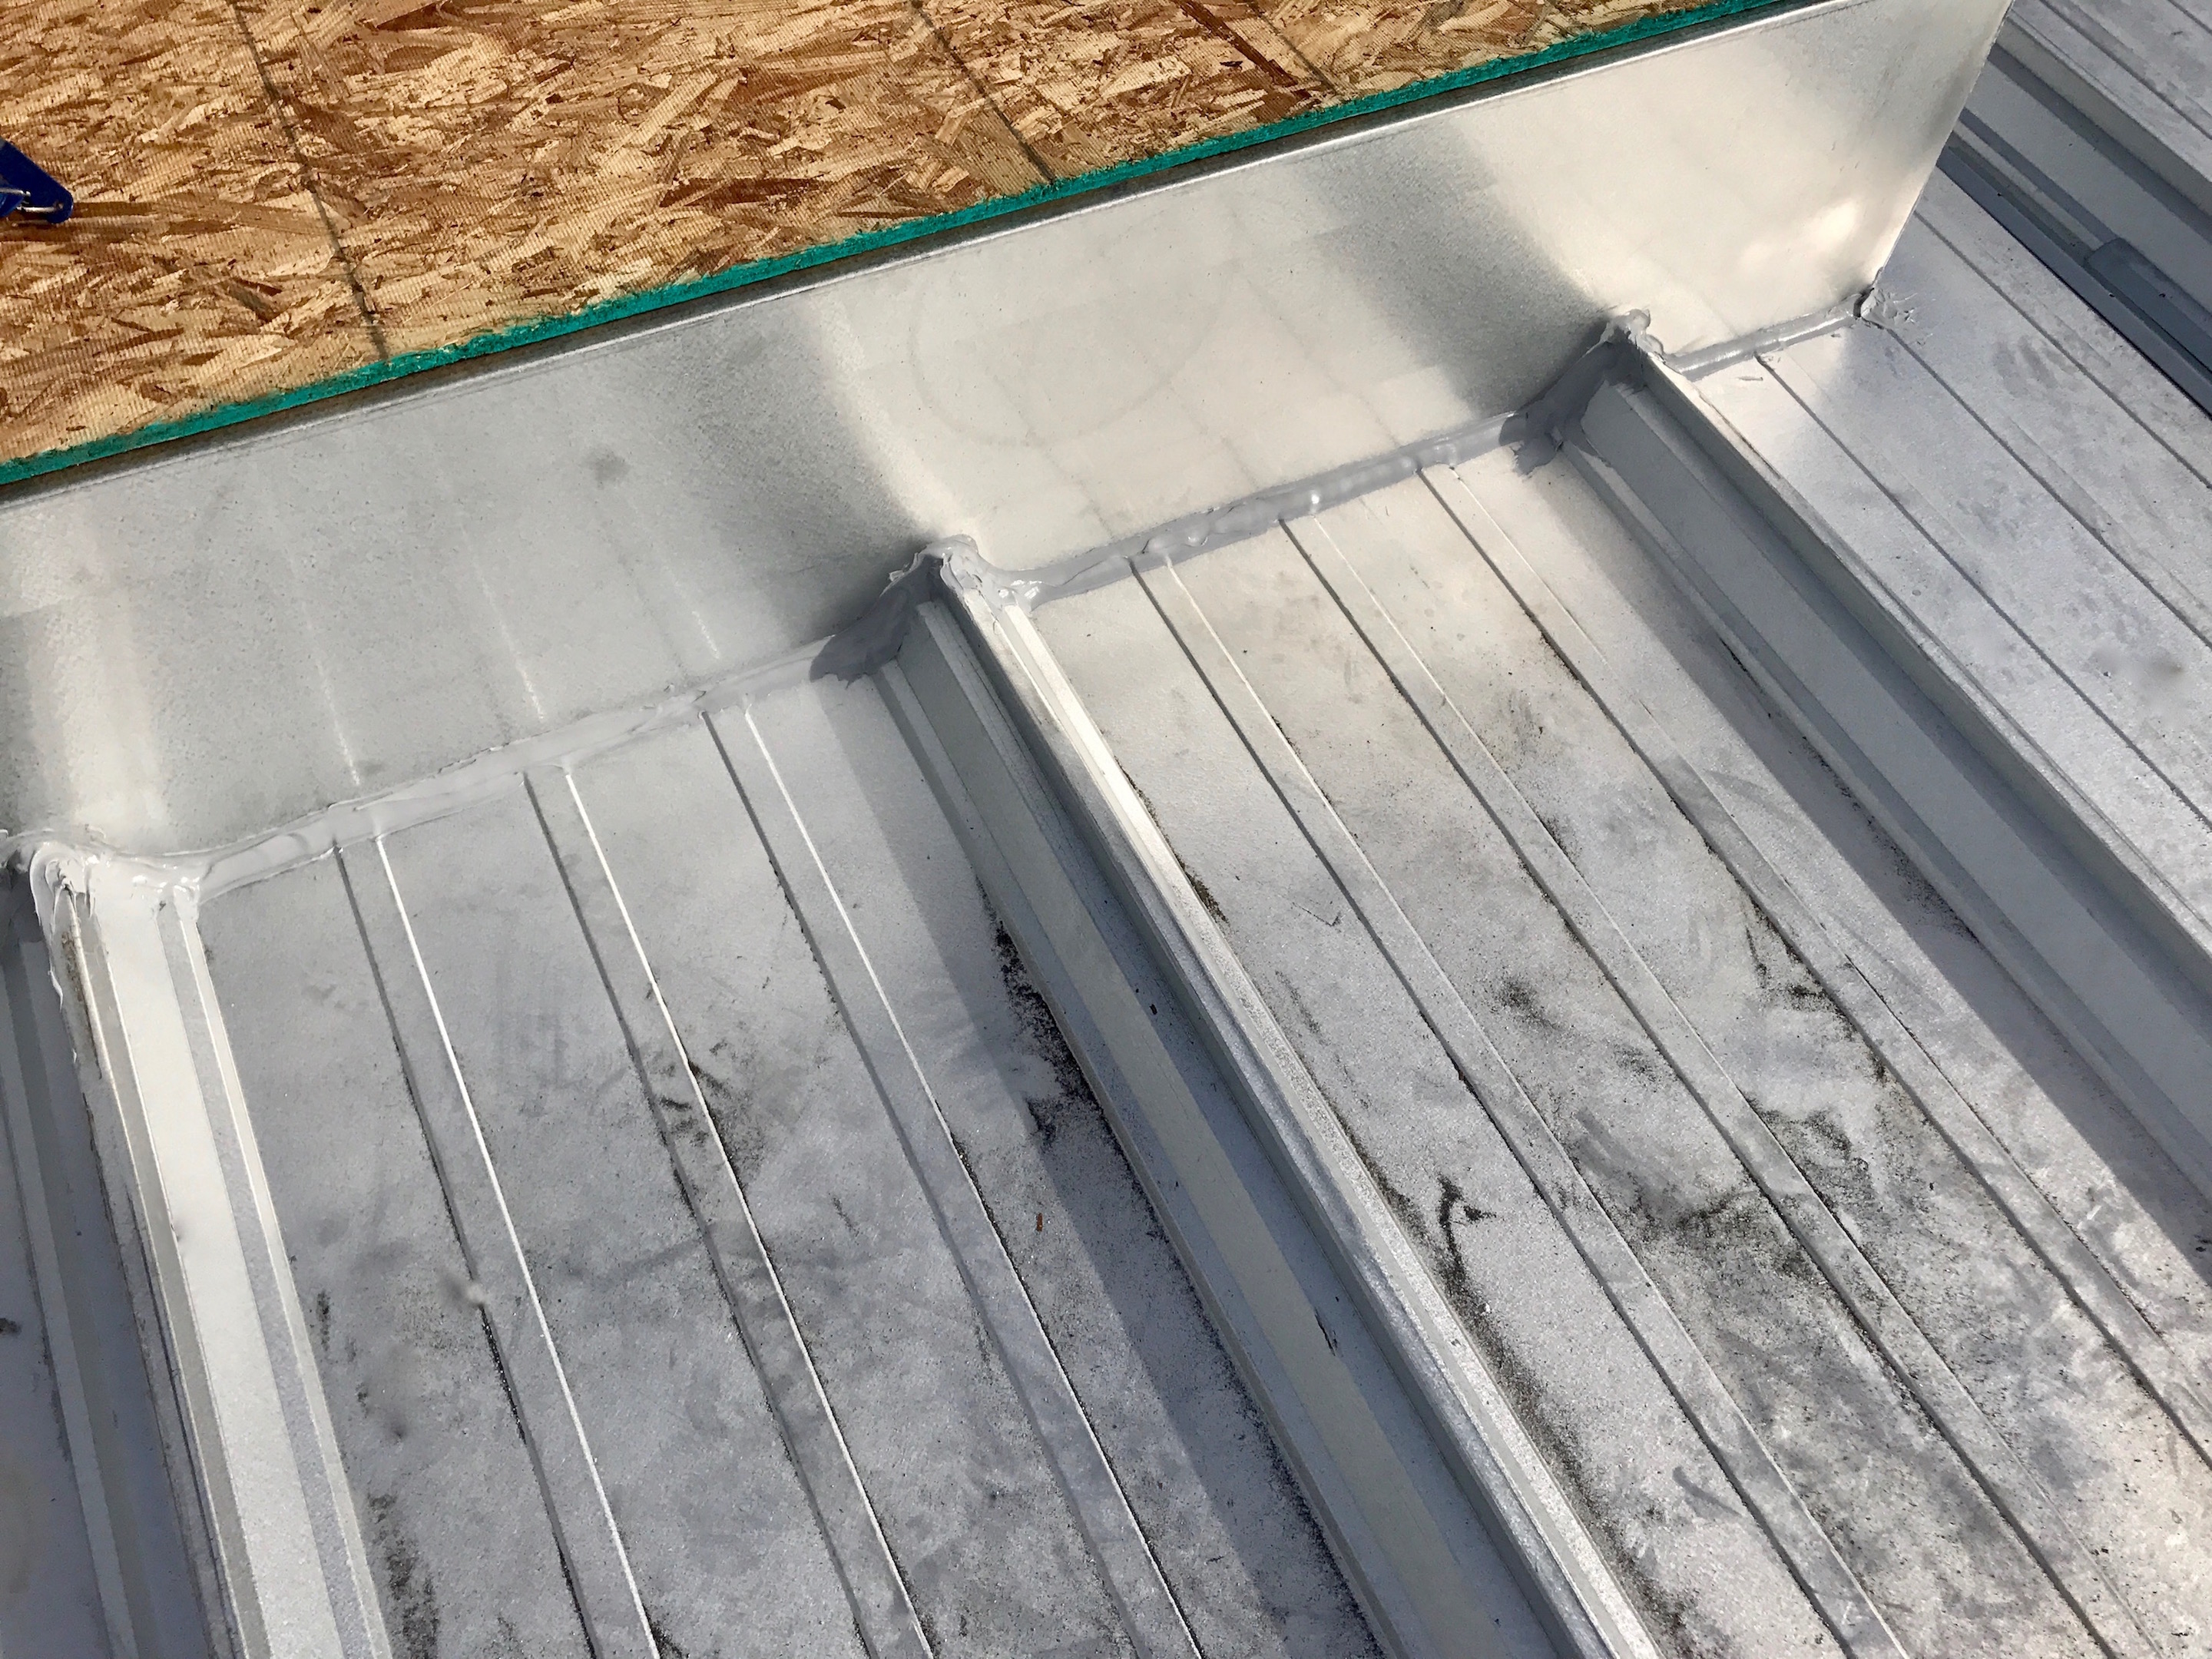
I] Clean up the area around the opening joint between hybrid curb and roof to remove any loose particles.
J] Apply caulk around the perimeter of the hybrid curb in an even and concise manner, utilizing the proper tools, to ensure a consistent seal.
That is it! You are ready to move on to the next one!