Specialty Roof Curbs
Our Specialty Curbs are easy to install thanks to their one-piece design. Created to conform to a variety of roof profiles, these curbs will end up saving your team both time and money where installation is concerned.
Request A Quote
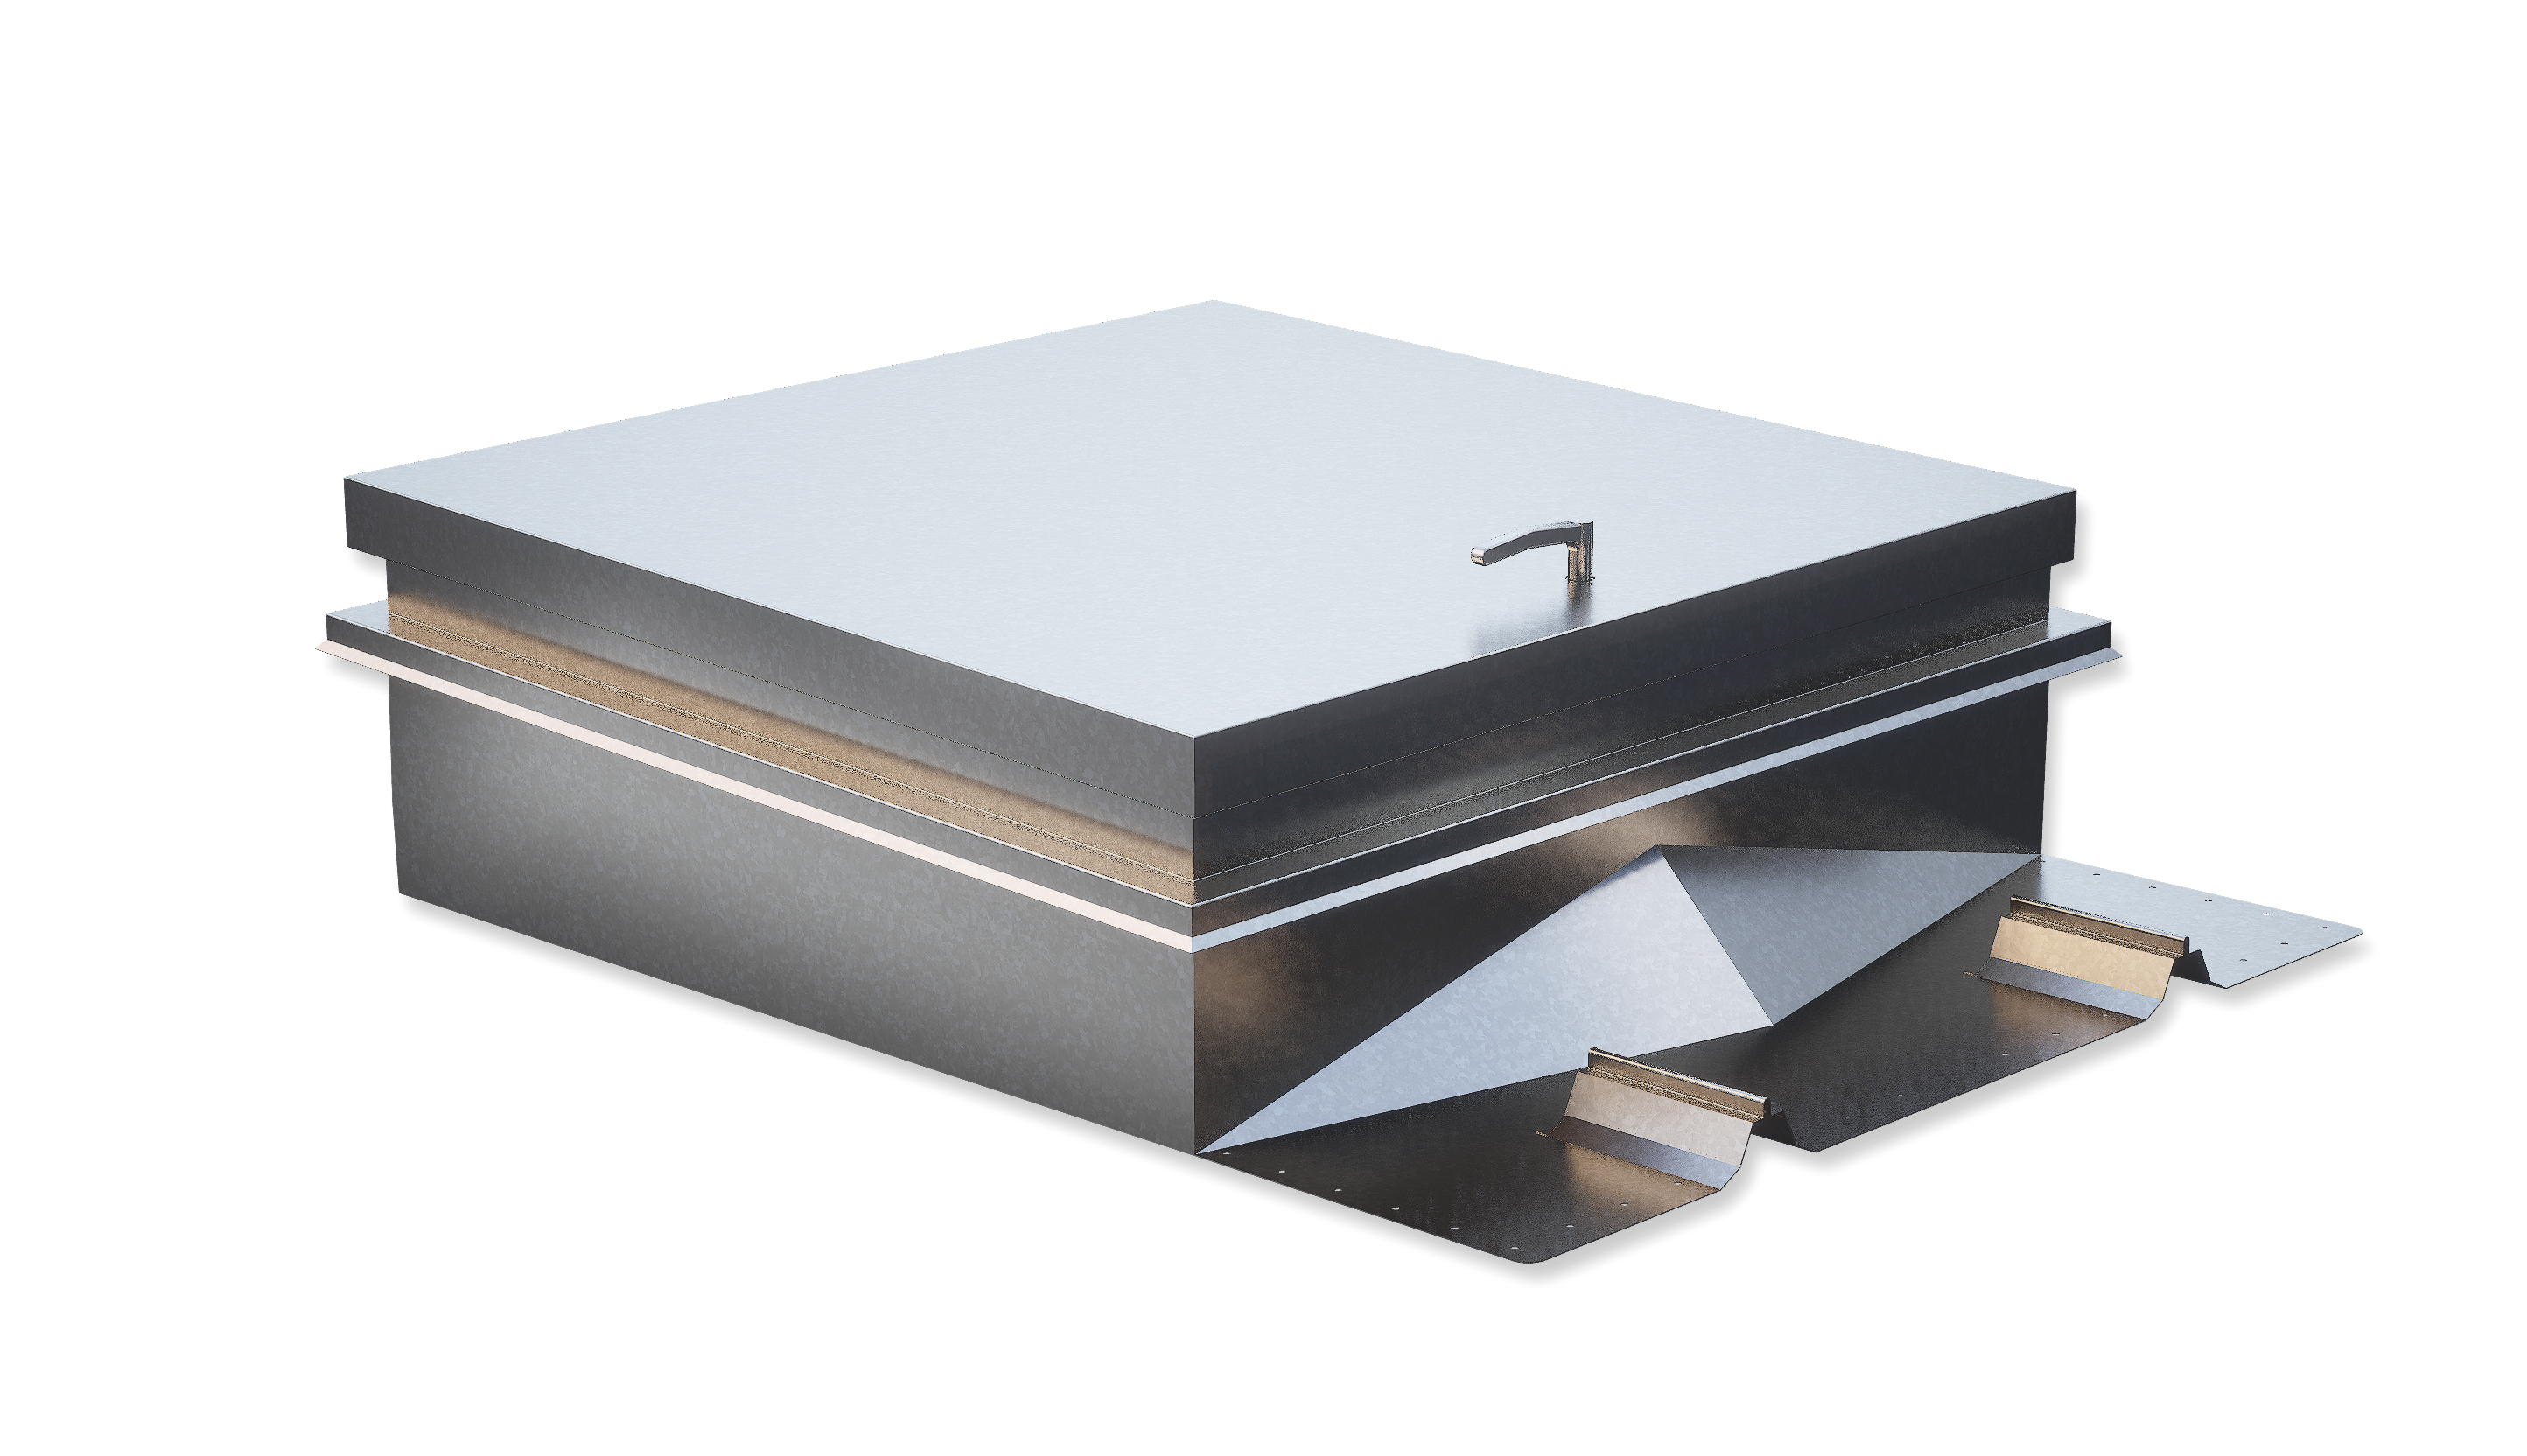
Specialty Roof Curbs
- One-piece, solid welded design.
- All Galvalume® construction – 18 to 14 gauge based upon load requirements.
- Our round curbs can range from 10″ to 30″ in diameter.
- Note that some sizes may not be structural in nature – let us know if that is a concern.
- No slope or low sloped options available.
- Hardware including fasteners, caulk and framing members.
- All welds sealed watertight.
- Various insulation options available.
- Standard 10″ height.
We provide everything you need to get the project done right, the first time.